Jan 13, 2015

Angels to keep you creative


Happy and creative New Year dear fellow crafters! I love angels and love making them. This easy to make tutorial I found on this site. Even beginners in crochet will be able to make them.


Read more "Angels to keep you creative"

Dec 23, 2014

Steampunk brooch in a half an hour


It is amazing how you can use junk and scraps to make extraodinary things. For this brooch I used fabric scraps and old watches I bought on flee markt. Few stitches, hot glue and brooch pin - and brooch is done.

Read more "Steampunk brooch in a half an hour"

Nov 24, 2014

Vintage cupboard to cheer me up


This cupboard I put in my kitchen proofs that old furniture could and should be refurbished to improve our space and bring something original in our home.

And this is how the adventure started


This old cupboard belons to my family for decades - in good condition, but ugly. Decided to make something new.


First, of course, dismantled doors and metal parts.


Then sanding, sanding, sanding and cleaning the dust.


Priming is important step as well. I am priming and painting all sides, even back side.


 I decided to combine  three colors - white, black and red.  This plastic plate is cheap and very useful for painting, recommend to use - there is part to pour paint and part to drain roller or brush. 


I am using ruller for the majority of my work, brush just for corners. Look at this post to see how to chose rollers and brushes.


For the stripes and combining colors, use tapes.


And now, there are some details of the finished cupboard:


Read more "Vintage cupboard to cheer me up"

Oct 12, 2014

Digital storytelling for crafters


Crafters and Bloggers love photos and videos, but how to make them? What software to use, how it works, is it expensive? And how to combine photos, video, music, speach?
I recently attended amazing course on Coursera, I woudl recommend to anyone. If you miss this opportunity in October, visit the site Digital Storytelling where you can find tons of materials and tuts. Good luck, enjoy!
Read more "Digital storytelling for crafters"

Sep 22, 2014

No sugar oven-baked plum jam recipe


I know there are number of jam recipes on the net, but sawing so much sugar added in the most of them, I decided to share this very simple jam recipe with NO sugar at all.


Recipe: 

- 3 kg of plums
- rum or vanilla sugar to add - optional
- small portion of salt

Steps:

1. Wash plums and remove stalks and stones.  All fruit need to be healthy, discard any that have rotten parts.

2. Preheat your oven to 200 C (400 F). Place the plums into a deep roasting pan. Add pinch of salt. Bake it until the juice evaporates (not all of it) - cc 2 hours,  stirring occasionally. Optional: when you notice jam is thickening, add rum or vanilla flavour. 

3. Remove from the oven. If you prefer, chop up with the stick blender. Pour gently into clean, sterilised, hot  jars.  I usually leave jars with jam  in the oven  on 100⁰ C for 15 minutes and then close them. Enjoy, it is really delicious!


Read more "No sugar oven-baked plum jam recipe"

Aug 21, 2014

Create your own jam labels or tags using MS Word


There are thousands of label examples on the net, but i usually have my own idea, or the label I like the most can't be customized. One afternoon I tried to create label by myself, using MS Word (2010). It wasn't very easy ("&#%!@?!" for Microsoft), but neither so difficult. I prepared tutorial how to do it, just to remind you on the possibilities of the tool you probably have installed.


Tutorial how to create labels and tags using MS Word


The tutorial is related to Microsoft Word 2010 (I am mentioning that because, as usually, some features are improved, but for some of them, Microsoft made step back).

First, decide on the shape of your label.


On Insert tab use Shapes and choose the one you like - this time I added 'blue' shape (half circle).


You can change the size of the object buy dragging one of the small circles (green arrow) or you can rotate the object (red arrow) -  rotate this circle (of yellow color).


You can see that the object's size changed when dragged the small circle.


Changing color and outline


To pick up the desired color of the object, mist go to the Drawing Tools (upper right on the image).

Click on Shape Fill and pick up the color. Or you can choose No Fill if you don't want any color.


For the outline, procedure is very similar as above, only click on: Shape Outline. 


For  my labels, I chose the 'No Outline' option.

Want more sofisticated look? 


On the 'Shape Fill' pop up menu choose More Fill Colors for the color options or : Texture 

 รจ M ore Textures  for the other options available.


Now you can customize gradient, patterns, shadows, ... .  Try and play a little bit.


This is the example for the gradient.


And this is how to choose the pattern - I chose the dot pattern, of course.


Adding image and text


First step is to pick up image you like. I wanted to remove borders and how I did it read on my post here.

After you inserted the picture, right click on it - you'll get pop-up menu. Click on 'Wrap Text' and choose the Front of Text option. Now you can drag the picture on the created shape.


You  see the plums on the the shapes (previously I dragged the smaller shape and put it on the bigger one). 
To add text,  repeat steps Insert -> Shapes -pick up the Text box.


Input desired text, choose the font size and type. If you want additional customization, click on letter A  on the Tool bar - choose on of the offered options and, additionally, option Transform, if you like e.g. rounded text.


Label is finished. 


How to copy labels


Usually, I need more than just one label. The easiest way to copy it is first to select all 'parts' (select one by one and keep the Shift button pressed).


After selecting all components, click on the Group icon and choose Group. Now, you can Copy --> Paste your label as a single shape.


Hope this is helpful. may be there are some other ways to do some steps, I am constantly discovering  MS Word features or how to do something.


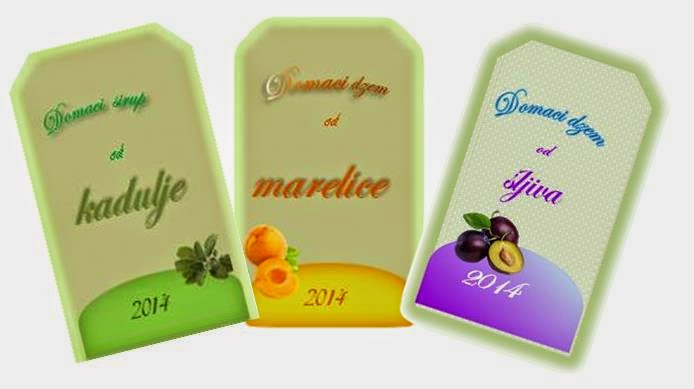
jar tag

jar tag


jar tag

jar label


Read more "Create your own jam labels or tags using MS Word"

Aug 4, 2014

Homemade Sage Syrup


Sage (or Salvia Officinnalis)  is one of the most healing plants, well known and used since the ancient times.
This recipe is so simple and the result is amazing - tasteful, refreshing and healing   sage syrup.


Ingredients:

30 dag of sage leaves ( I have huge sage in my garden and used it for the recipe)
2 kg sugar
7 - 10 dag citric acid
2 l water

Take pot (pressure cooker is good choice as it has lid that could be firmly closed), cover the bottom with leaves and sprinkle them with citric acid. Continue with layers of leaves, each one sprinkle with the citric acid. 

In another pot put 30 dag of sugar and heat it until crystals dissolve, then put 2 l of water, add the rest of sugar and cook about 20 minutes. Stir the sage leaves with this mixture, close the lid and leave 24 hours. 
Filtrate the liquid and pour in bottles.

Use undiluted for sore throats or thickly coughs, even asthma or diluted as a refreshing drink.
Read more "Homemade Sage Syrup"

Jul 18, 2014

Cheerful Summer Bag


Finally finished this cheerful summmer bag. Birds you can see are brooches so I will be able to wear them in the winter, too, to make my day. Tut for brooches find in this post.

Just to give you a short input how I made it: 


Original fabric is upholstery fabric I bought in Ikea. 


Decided to painted it - used acrylic paints for fabric I already had.


I like to have pockets in the bag, so I made a lining with zipper pocket on one side and plain pockets on the other.


After the bag was finished, just put my birds on it.


Read more "Cheerful Summer Bag "