Apr 10, 2013

From jeans skirt to the bag tutorial


Finally I found some time to finish the tutorial for this bag. I really love it, which is not always the case with my projects. 


Jeans skirt I came across during wardrobe clean-up was perfect for this  project. First, I made some decisions about basic bag design and size - decided to use the overall upper part of the skirt as it is - with pockets and zip,  determined the lenght of the bag, taking into account the bottom width and chose not to sew the lining. This was the easy part. 


Afterwards was the time to think about patches patterns and decorations. My cats helped - they are always around, together with the dog (when I am doing something) 'assisting' - steeling cloth or lying on the fabric. 


Two cats -   and the main theme was chosen. Found cat figure on the internet, print it, cut it and draw it on the fabric. 


Fantom (vanishing) pen I found very usefull in a number of my projects - on the photo above the smaller one. I used it on this project as well. The beauty of this pen is that you can use it as any other pen, but the ink vanishes after few hours or if you apply acrylic paint or water.


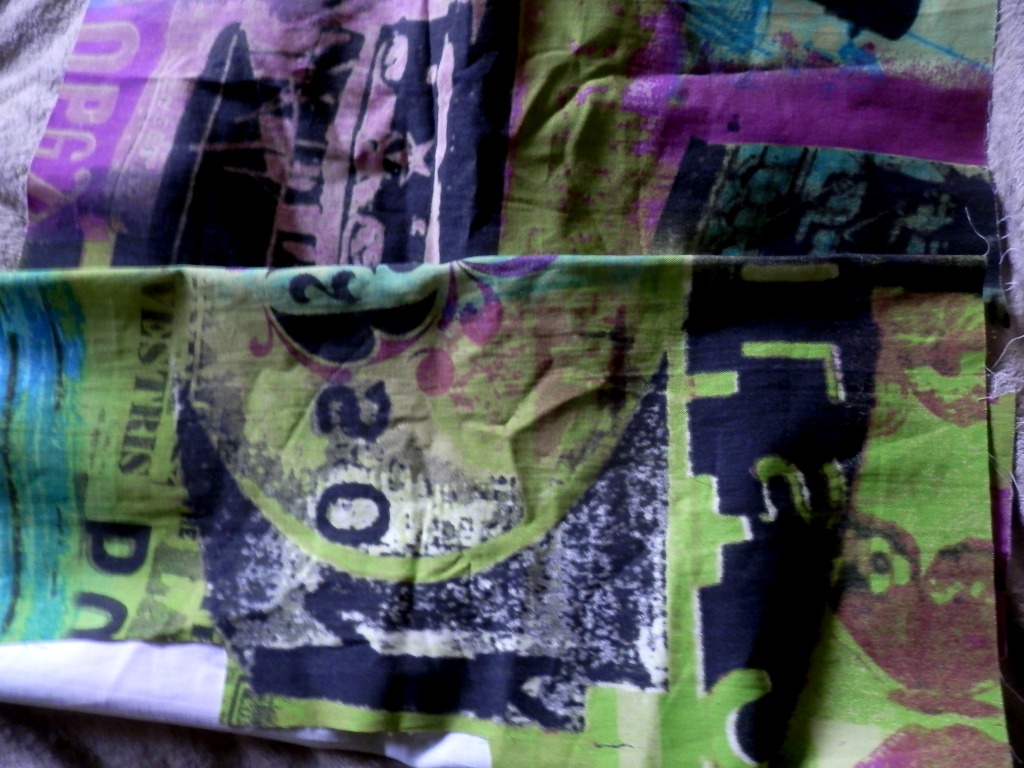
Sometime ago, spotted this colorfull fabric in the shop and bought it - it gives me various opportunities in my projects as  different parts/colors could be used. For this bag chose mostly green color, it is spring, isn't it.


To fix pattern on the bag I use two-sided fusible web  (meaning adhesive is on the both sides). First, copy the pattern on the paper side of the fusible web and cut it off.  As I ironed it first on the fabric chosen for the pattern, had to take care how to (in what direction) draw it on the fusible web.


Finally, ironed the pattern on the skirt to fix it to be easier to sew it with the zig-zag stich.


For the filled cat head, draw a pattern on the fabric - cca 1 cm bigger  than on the main pattern and cut two pieces  off as well as the eyes.


Fot the eyes used the same process - ironed it on the two-sided fusible web and then on the fabric.


Sewed the eyes with the zig-zag stich and whiskers using regular stich.


Sewed two parts leaving a small hole at the bottom - this helped me to turn over the fabric on the right side and to fill the head with the sinthetic filling. Drew the eyeballs with the pen for the fabric. Sewed the opening at the bottom and fixed the head on the skirt. 


Made as well another head. 


Similary made a filled paw.

Used metallic pen for fabric for the additional decorations - whiskers and dots.


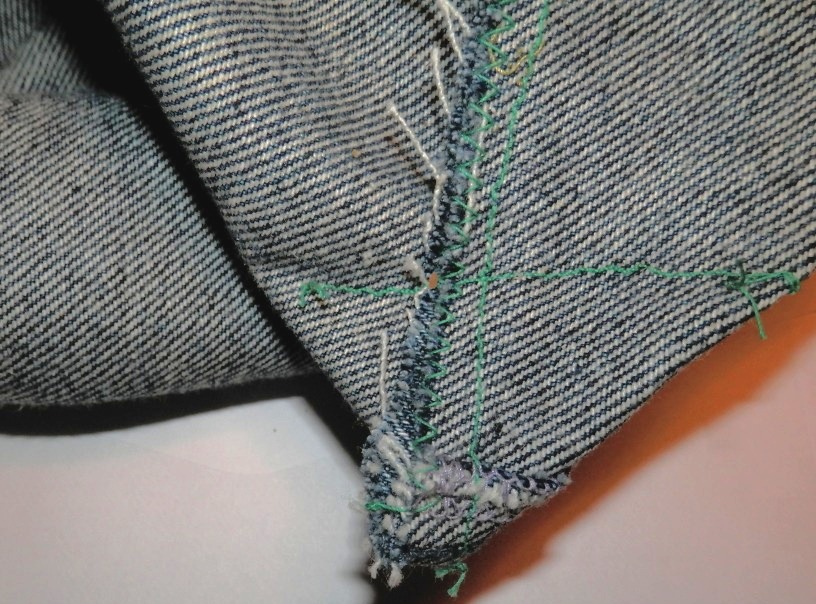
Now it was time to sew the bottom fo the bag and to achieve the bag width, made this triangles.


For the bag handles I cut off strip 10 cm wide, used one-sided fusible web and sew it.


Add the belt found in the market for cca 5 $ and the bag was ready.

Read more "From jeans skirt to the bag tutorial"

Apr 5, 2013

Love your home plants organically


Although it looks like  spring will never come here (weather is awful this year), at least days are longer and it is time to check my plants, see what need to be done – soil change, transplante, fertilize, cleaning leaves. I admit, during the winter, just water them and leave them to rest, trying to keep them alive. But now, whether you have just one plant or house full of green friends, you need to take care of them. Tipically we are used to buy fertilizer or other products but there are organic means we already have in our homes that can be used to cultivate plants (with no need to make compost which could be difficult if you live in an appartment). This is particularly important for  my  own small  'herb and spice' garden  I want to grow organically.

So here is what I found useful.


Tips and tricks how to cultivate home plants organically


Apples are excellent for plants, particularly flowers – put apple pieces in the  soil of the plant. It is fertilizer that will improve flowering. 


Banana skin is also very good fertilizer – chop it and put it on the soil.


 Coffee, flat beer,  black tea, milk  dilute and add to the water while watering plants – they all  contain major nutrient plants need: nitrogen, phosphorus and pottasium.
For coffee eg. I usually make mixure of 1/4 coffee and 3/4 water - it looks like more as a tea, than coffee (as on the photo on the left).


Don't waste egg shells – they are excellent for plants- crush the shell and put int he soil.
Read more "Love your home plants organically"

Mar 28, 2013

Cupboard makeover


Last week we spent in our summer house in Murter, on the Adriatic coast. But didn't just  enjoing long walks. I finaly managed to makeover an old cupboard I planned for years. And I am very proud with myself - I like the final result (which is not always the case), and did it in three days. There are some details I'll add next time we go there, but this is it.


See below how the cupboard looked like before I rufurbished it - ugly and ruined:


I was taking pictures and prepared tutorial how to makeover and paint cupboard.


Tutorial how to refurbish cupboard (or other piece of furniture)


Material and tools


Acrylic paint and primer
Acrylic paints and primer; transparent oil varnish


Acrylic filler and spatulas


Orbital sender and sanding paper


Sredrivers
Cordless impact driver or ordinary srewdrivers


Roller and brush
Roller and brush


Additionally, I used some foils for stencils, golden acrylic decorative paints and thin brushes and glazing medium for glazing.


Step 1: Review and decide what to do


cupboard before refurbishment


Take a photos of the cupboard from the all angles - not just for the archive, but to be sure how to assemble all pieces after the refurbishment. Thoroughly review piece condition to see what you need and can do. Sometimes you'll need to ask for help from  some handy friend or professional carpenter, or just need to borrow some tool. And sometimes you'll find quite different usage of the item. This cupboard, focusing just on the wood, was in rather good condition - few damages on the sides and door edges  I decided to repair with filler.


Step 2: Dissemble all pieces


hinges for cupboard door


Philips screw


Dissemble all pieces, it is easier to work. Take photos while doing that to be sure how to assembe them. I am planning to replace those slot screws with Phillips ones, as have cordless impact driver (borrowed from my hubby).


Step 3: Repairing and Sanding 


how to apply filler


how to apply filler and repair wooden furniture

how to apply filler and repair wooden furniture


Before starting to work, I cleaned and washed the cupboard with dump cloth, used water with a few drops of dishwashing liquid in case of greasiness.
Minor damages I found on the door edges (and inside, on the cupboard sides), I repaired with the filler. I used acrylic one, it is fast drying and easy to apply. Put some ammount on   the spatula (or directly on the damaged place) and flatten it with spatula. The coat should not be thicker than 1 mm - if necessary, repeat the process. When the filler is dry, sand the repaired place and view if it is visible on the surface - if it is below the overal surface level, need to add filler. If it is higher, need to sand a little bit more.


Step 4: Sanding, Priming, Sanding


sanding cupboard door


Priming cupboard door


Sanding and priming are important (although strenous) steps in furniture makeover. Skipping preparations might not be visible at once, but can impact the resistance of paint peel off. So, I sanded door (both sides) and carefuly cleaned the dust with damp cloth. I used orbital sander and sanding paper grade of 40. After that, applied the  first coat of primer. About the benefits of the primer you can read in more details in the post Furniture makeover 3 - Benefits of primer. As the primer is white, you can easily check if you repaired all damages and if some repairs are still visible (not leveled with the surface). Sanded again (with the finer sanding paper grade of 60) and applied second coat of primer. This process I did for the second door and outside  cupboard surface. Inside the cupboard just applied two layers of primer. 


This is how cupboard looked like after the firtst coat of primer, much better then isn't it?

Step 5: Painting (at last)


At last, I was ready for the painting - the best but the most challenging step.  I am always beeing afraid of what will be the final result. Am I going to be dissapointed after all these efforts? So, I started. I am using roller for the painting and brush for the edges. I usually first paint all the edges and then paint surface using roller.


This is cupboard after the first coat of paint. In my experience, it is better to use two (ans sometimes three) thinner coats of paint than one thick. 


And cupboard after the second coat - quite good.


For the doors I used a light blue color I mixed myself, using white and blue acrylic paint and added a litlle bit of yellow pigment. When mixing paint, general rule is to add darker paint into the light one (not vice versa, the result will not be as expected).
Decided also to add decorations and used stencils and golden paint for the anchor and 
rudder.

Step 6: Distressing - glazing


At the end, I decided to distress doors by glazing them.


First, I waited  the base paint to dry completely - that's the beauty of acrylic color, it took just about 20 minutes (may be even less).

Mix the glaze with the paint according to the manufacturer's instructions - I put 1 amount of dark blue paint to four amount of glaze. Applied the glaze to the door in sections using a brush. Before the glaze dries, used a clean cotton rag to blend the glaze until achieved the desired effect. When the glaze dries, you can always add additional coats of glaze until your  piece is the colour you want it to be.


To be on the safe side, first glazed inside of the door, to see the result.


Step 7: Assemble all pieces


Finally, it is time to assemble all pieces together. I replaced slot scres with the Phillips ones (and used impact driver, but ordinary one will do as well). Also sanded a little bit hinges and them with golden paint. 
Read more "Cupboard makeover"

Mar 25, 2013

My trip to the Adriatic sea


Back to Zagreb and looking out the window to blizzard, can't believe that only two days ago I was enjoing beatiful sunshine weather at the Adriatic coast. We spent few days in our summer house in Murter. It is a village on the island and an entrance to Kornati archipelago. I took some photos during walks with my dog -  think you can feel tranquility of the place in this time of the year (in contrast with the summer crowd).


Read more "My trip to the Adriatic sea "