Nov 10, 2013

Trolley shopping bag - something old, something new


My weekly ritual is visit to the green market where local farmers sell their product. I am going there for years and built a relationship with some of them. I know where to buy fresh cheese, who has the best carrot or potato, who's products are organic. And always buy over 1o kilograms, it's too heavy for me to carry bags. Trolley shopping bag is marvelous invention, I've been using it  more than 20 years. On the old one bag became worn out, metal construction was still good. And I decided to sew something original, and the bag that will match my requirements. This is the result, I am very pleased with the result (and that is not the case with all my projects). Here is the tutorial how I made it.

Trolley shopping bag DIY tutorial

Material:


- old jeans (I bought two pairs in second hand shop for 3,5 $)
 - leftover fabric
- eco leather (decided to buy it later on)


From back part of the jeans legs made front of the trolley.
Another trousers used for the back side.


This stripped fabric I used for the sides. The upper edge I strengthened with the nonwoven and two layers of the fabric.


I need big inner pocket of the shopping bag (this I couldn't find in any bag I could buy). So, I used jeans as well for the base and sewed original pocket to be used as one pocket and stripped fabric for another one. 


Stripped fabric fastened on the base together with the zipper (see photo).


For the lower end of the pocket I made a pleat, to be able to put in more things.


For the bottom of the bag decided to use eco leather. First pinned it, then hand stitched and finally sewed (twice, to be firm).


The original bag was made of synthetic material. Jeans is rather soft and heavy and the back side was not standing upright. Wire frame from the old bag I used to fasten the  front side. For the back side had several options and decided to make insert from the fabric and sponge and input the cardboard. 


Finally, used   eco leather to make the cap. Added some details in the meantime.

My trolley shopping bag :


Read more "Trolley shopping bag - something old, something new"

Oct 28, 2013

Fabric pumpkin

Photo taken from this site.

I am obsessed with pumpkins, can't help it. For those preferring to sew and not to carve or paint, here are some examples of fabric pumpkins and tuts how to make them.


How to make fabric pumpkin

how to make fabric pumpkin


On this site you can find detailed tut how to make this gorgeous pumpkins. Although, according to the tut, genuine stems are used, I think some wooden twig will do as well.
one very easy to make


These are really funny and original, remind me on Cinderella's carriage. If you like them, go to the thecottagemama.com .


This is one very easy to make pumpkin.


And if you prefer paper, this is project for you.
Read more "Fabric pumpkin"

Oct 16, 2013

Pumpkins again


Pumpkins are 'in' again. I love them - they are so colorful, interesting, funny and tasteful in so many ways, even seed and oil are delicious. Although Halloween is not so popular in Croatia, we love to decorate pumpkins and squashes.
Internet is full of pumpkin art, here are some I found the most interesting or funny, enjoy.

How to make a silhouette pumpkin

how to carve pumpkins


This easy to make tut find on www.thistlewoodfarms.com.

Pumpkin lanterns

how to carve pumpkins


Design*sponge is always current with themes. 


Patchwork pumpkin (and other tuts) by Alisa Burke


On the blog of Alisa Burke you can find various 'pumpkin' projects created over the years.


How to carve pumpkin


And, for the 'zero' step, find out how to carve pumpkin. Remeber, it is not easy.


Another carved pumpkin I realy love.


Few more photos for pumpkins lovers.


Read more "Pumpkins again"

Oct 8, 2013

Lavender bag


Lavender is certainly one of the best plants in my garden - so modest and durable, yet giving us so much joy. Except in the very begining, lavender don't require a lot of care. I enjoy the laveneder bushes all year long - in summer as well as in winter, not to mention the  beautiful fragrant flowers. I collected flowers month ago and found some time today to make a little lavender bag (some other ideas still in the pipeline).

How to make lavender bag

Material


Material: fabric scaps, rope, lavender, wooden bead


Cut a paper triangle (pattewrn for the bag), then cut two fabric pieces. Put them together (right sides together) and sew them, leaving opening at the base.


Turn on the right side, fill in with the lavender and  hand sew the opening.


Pull the rope through the bag and through the bead, make simple knots.


Hand sew little lace skirt and lavender bag is finished.


Read more "Lavender bag"

Sep 23, 2013

New look of an old benches


Two benches on my terrace realy needed a 'facelifting'. I planned for  months this renovation but there are always something else to be done. Benches were in good condition but shabby (not shabby shic, unfortunatelly).

Short tutorial how I renovated benches


This is small bench 'before' - you can see that the surface isn't very nice.


Even just sanding improved the image of the bench and gave it better look. I used wood stain (acrylic, of course) for painting - two coats were enough. And one coat of varnish (satin) for the protection at the end.


Now it looks much better, doesn't it?


Similar process was done with the bigger bench.


First step -  sanding.


Second step - applying wood stain.

Third step: painting metal parts. I protected the wood with the tape and then painted the metal parts with silver Hammerite (oil) paint. Why this paint? Because I alredy had it and because it has three effects: rust protection, primer and coloring.


Read more "New look of an old benches"

Sep 16, 2013

Controlling (or not) your garden


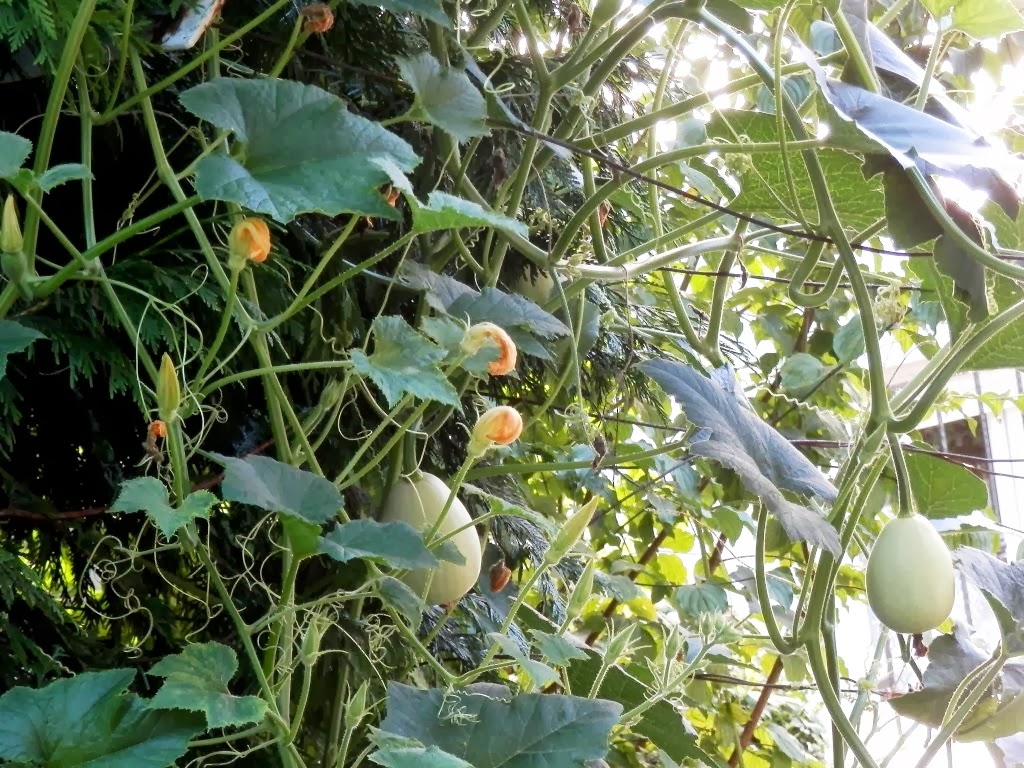
Are you very strict when planning and monitoring the plants in your garden? I am not. First, I prefer the 'English' type of garden - to look naturally, as much as possible. And I like to leave the unknown or unplanned plant to see how it will look like before I eventually pull it out.  Rather often I get so interesting and colorful  scene I could never make myself. This year I left pumpkin to grow in unusual part of the garden and in gratitude it climbed the tree and made a lace.  Nasturtium and the four o'clock flowers (Mirabilis jalapa) spred over the garden every year and I just love them. So, leave the plant to  grow, and you may be  pleasantly surprised.


Read more "Controlling (or not) your garden"