Sep 23, 2013

New look of an old benches


Two benches on my terrace realy needed a 'facelifting'. I planned for  months this renovation but there are always something else to be done. Benches were in good condition but shabby (not shabby shic, unfortunatelly).

Short tutorial how I renovated benches


This is small bench 'before' - you can see that the surface isn't very nice.


Even just sanding improved the image of the bench and gave it better look. I used wood stain (acrylic, of course) for painting - two coats were enough. And one coat of varnish (satin) for the protection at the end.


Now it looks much better, doesn't it?


Similar process was done with the bigger bench.


First step -  sanding.


Second step - applying wood stain.

Third step: painting metal parts. I protected the wood with the tape and then painted the metal parts with silver Hammerite (oil) paint. Why this paint? Because I alredy had it and because it has three effects: rust protection, primer and coloring.


Read more "New look of an old benches"

Sep 16, 2013

Controlling (or not) your garden


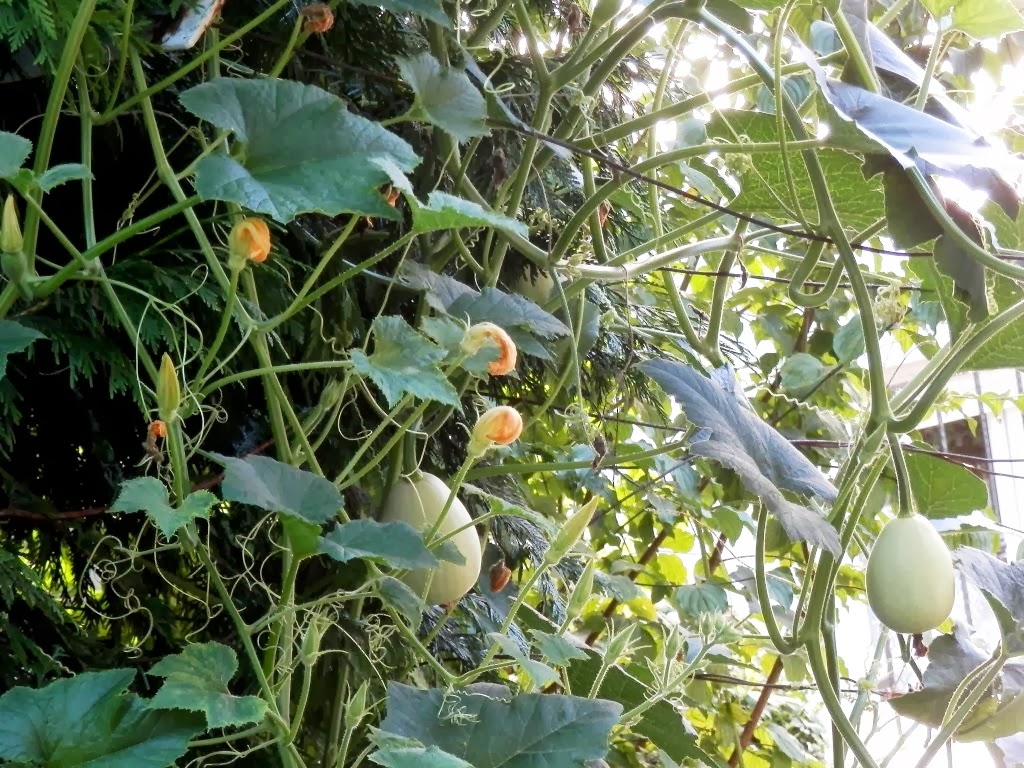
Are you very strict when planning and monitoring the plants in your garden? I am not. First, I prefer the 'English' type of garden - to look naturally, as much as possible. And I like to leave the unknown or unplanned plant to see how it will look like before I eventually pull it out.  Rather often I get so interesting and colorful  scene I could never make myself. This year I left pumpkin to grow in unusual part of the garden and in gratitude it climbed the tree and made a lace.  Nasturtium and the four o'clock flowers (Mirabilis jalapa) spred over the garden every year and I just love them. So, leave the plant to  grow, and you may be  pleasantly surprised.


Read more "Controlling (or not) your garden"

Sep 10, 2013

Pincushion in no time


For a long time I thought pincushions are just for decoration. I sew as a hobby, from time to time and found out that I am frequently loosing my needles, or can't find then when I need them - and pincushion is a great place to put them. 


Tutorial how to make pincushion

It is really easy, it took me more time to take photos and make this tut than to sew the pincushion.


First, cut four pieces 10 x 5 cm (or some other size) from the chosen fabric. 


Sew two and two pieces together.


Pin two sides together and sew the edges leaving one half of a side.


Reverse on the right side through the opening, stuff with filling and hand stitch the opening.


Sew the button (for decoration) and elastic band on the other side to put the cushion on the wrist, if you need.

Read more "Pincushion in no time"

Sep 8, 2013

How to remove white stains on furniture


white stain on furniture

white stain on furniture


I am in the 'cleaning' mood these days - it is warm but not hot here, no raining and just perfect weather to bring some order in the house. So, I moved all things from the big round table we have in the dining room and saw these nasty white stains. How to clean them?  - asked Google, of course. And found some interesting tips. First, tried with a mix of olive oil and vinegar - no result. Then tried with mayonnaise - no result again.


iron on white stain on furniture


The third attempt was bingo - took travel iron (because it is small and has no steam), old cotton rug and 'ironed' over the stain for a few minute. The result was amazing - stain was merely visible. Repeated with another one and now my table looks  almost as good as new.


Anyway,  If you decide to do the same, be careful and try first on a small spot. I am not sure why this worked for me and would it be as good on some other type of the furniture.
Read more "How to remove white stains on furniture"

Sep 2, 2013

How to clean and preserve brushes


When I began to refurbish furniture, read tons of material about paint, wood preparations, primer, fillers. I took brushes 'for granted', thought I knew enough about them. But after some bad experience figured out I have to improve my knowledge with this topic as well. First, learned which brushes to use with acrylic paint and which with oil one (see my post How to choose paint brushes). Cleaning and preserving brushes is important task, particularly if you buy better (and more expensive) ones, which I prefer. I usually use acrylic paint, cleaning tool is one of the reason - running water is the easiest way for that. With the solvent for oil based paint I can never achieve the same result. Be aware that tips below are just for the acrylic paint brushes.


Anyway, use cold running water to clean brushes immediately after the painting. Warm water will fix the acrylic resin (paint component) and paint will be sealed up for the metal part of the brush. After the washing, use paper towel or cotton rag to absorb the excess water and leave it to dry.

Keep brushes with the hair up.

From time to time it is good to make a bath for your brushes you are using the most: mix one tea spoon of sodium bicarbonate (or just one package of baking powder) with two dcl of water and put yout brushes in this solution, leave them over night. In the morning, rinse them thoroughly in cold water, use paper towel to absorb the excess water and leave them to dry. Soda releases oxigen which is very strong cleanser.

Read more "How to clean and preserve brushes"